
Before You Begin, Setup Preferences
Before adding forms and sending them to your patients, let's start by getting your preferences setup.
From the main Forms menu, select Preferences.

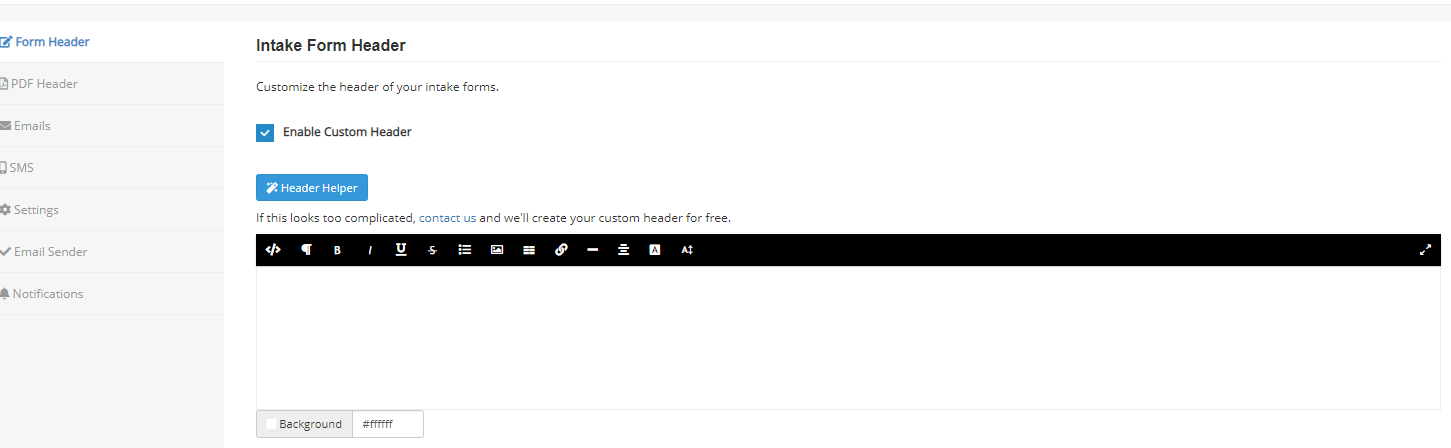
Form Header
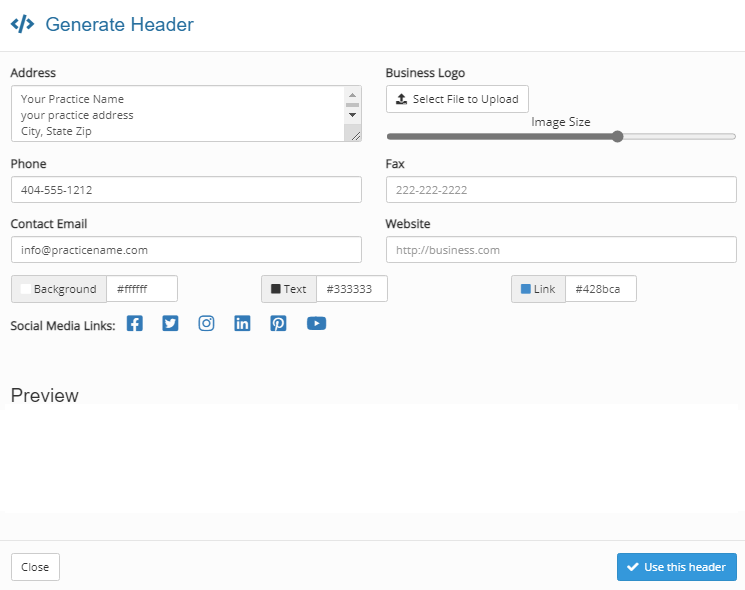
It's easy to create your own custom form header without knowing anything about HTML. To customize the header on your forms, click on the checkbox Enable Custom header then click on the button titled Header Helper.
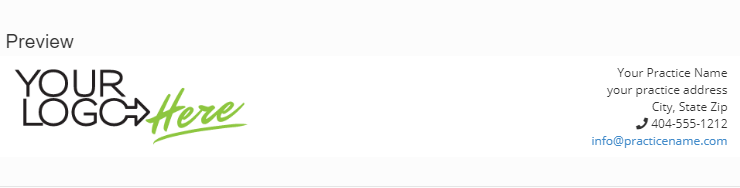
PDF Header
You can use the default header, your Web header or a different custom header on PDF forms. Most practices use their Web Header:

Emails
This is generally your first communication with patients after the initial phone call. Be sure to make a good impression!
The format bar has various options for text effects, adding images and links plus adding fields like patient name, practitioner name and special instructions. You can also add your own HTML.
Please note: do not delete the link and instructions at the end of the email - this is how the patient connects to your form and any instructions you entered when sending.


SMS
Customize your text messages when sending forms and from reminders. You can also set the time period for when to send reminders.

Please note: Do not change the intake link or your patients will not get a link to your forms.
Settings
Under settings, you can change the font and/or allow page breaks within questions on PDFs to save paper. Other settings include signature style, login requirements, date types, etc.

Email Sender
The email sender lets you set the from address on your outgoing emails. If there is no email sender set up all emails will come from [email protected].

Once you've added your Sender Display Name and your custom Sender Email Address, or if you have done this previously, check your DNS Settings. If you see DNS Setting Pending, as is shown in the image, please ask your IT team to follow the instructions below.
Instructions for your IT team to add DNS records to your domain
- Go to your Email Sender Settings (More > Settings > Email Sender). If there is no custom email sender set up, please add your sender’s name and email address and confirm the email sender by clicking the link in the confirmation email. The DNS records will then be displayed on a table at the bottom of the page.
- In a separate tab, login to your domain host's website (e.g. Wix, GoDaddy, BlueHost, Squarespace, etc.) and navigate to the DNS section of your domain.
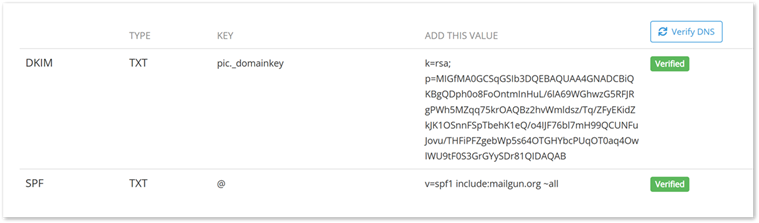
- Both DKIM and SPF are "TXT" type records and will need to be added under "Custom Records" if that option is available. You don't actually need to enter "DKIM" or "SPF" anywhere, these are not values but are informational only. Click "Add Record" or your domain's equivalent.
- Copy the data from Forms from the “Key” column and paste that value into your domain host in the “Host", "Name” or “Key” field. If you hover over the "Key" text in Forms, you will see that some providers require the full hostname, so take note of that in case your host needs it.
- Note: Some systems append your domain name at the end of the DKIM key, and this will often prevent us from being able to verify the address. You will want to remove this if possible.
- Next, copy the data under the “Add this value” column and paste that into your domain host in the “Value”, "Data", or "Text" field and save the record.
- Note: if an “SPF” record already exists in your domain's DNS records, instead of adding a new record, find the “SPF” value in your domain host and replace it with the value from Forms (the "Value" for SPF records starts with "v=spf1").
- Go back to Gaidge Forms and click the "Verify DNS" button to verify the new records. Once verified, the records will show a green "Verified" tag.
- Once the DNS records show as "Verified", please send a form to a test client to ensure that the email sender is functioning correctly. Please reach out to us if you get an error message.

Please review the following support articles for instructions about adding DNS records to the most common domain hosts:
Wix: https://support.wix.com/en/article/adding-or-updating-txt-records-in-your-wix-account
GoDaddy: https://www.godaddy.com/en-ca/help/add-a-txt-record-19232
BlueHost: https://www.bluehost.com/help/article/dns-management-add-edit-or-delete-dns-entries
Squarespace: https://support.squarespace.com/hc/en-us/articles/31120985010957-DNS-records-for-email
If you find you need additional support, please email us at [email protected] and we can work with your IT team to complete the setup.
Notifications
Setup which notifications you wish to receive:
