Forms Patient Profile
The Clients page lets you view and export patient data plus add new clients. From the Forms menu, select Clients.


Use the filters to limit your list, if desired. Click on the patient's ID or Name to view and edit the Client Profile section which keeps all information related to a patient. Much of this is populated from the forms they complete. On the left section of the page, you'll see their Timeline. That's where you will find all forms sent to this patient. An exclamation marks indicates a form has not been submitted, and check mark indicates completion.

On the main section of the Overview page, you'll find the Basic Information, aka Client Profile, which is a set of common fields used to store demographics, insurance information and treatment plan. To edit/update a value click on Edit.
From time to time, you may need to update data to re-send a contract. For example, a patient accepts treatment then wants to change the down payment. This is where you can do that, then re-send the contract from forms. Before beginning, be sure to have all the numbers you need. For example, a change in intial fee changes the amount financed, monthly amounts/last payment amount and possibly number of months.
Before you start go to contracts in Consult manager and copy these numbers so you will know what to enter. the Accepted Treatment amount is the responsible party balance. Be sure to check if the # of months * $amount = OOP-down payment. If not, there is a different last payment amount.


Select the Events tab to see a log of all events for this specific client. Here you can undelete a form if needed. If you are within the restore time window, you will see a restore text link next to the listing. Click the link to restore the form to the client's timeline.

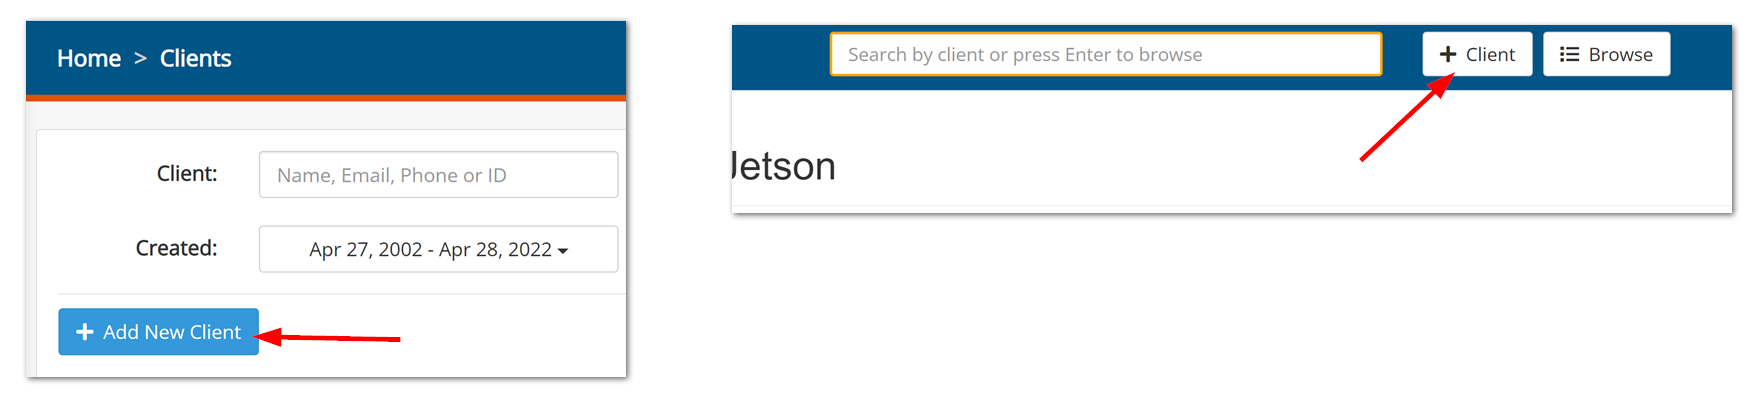
Click on + Client to add a new patient or Browse to return to the Clients listing screen. Profile Settings takes you to the custom fields and tags window.
Profile Settings

On the Client Tags tab, you can add items to use as filters. In this example, we have added patient statuses.

Patient Options
Below the menu bar, at the upper right are 3 option buttons: Add Tag, Access Control and Other Options (...)
Add Tag
You can add a tag to a patient to aid in filtering. It might be their school, or their status such as pending, obs, ready to start, or active treatment type.

Access Control
Here you can change who can see this patient as well as who is treating the patient.

Other Options (...)
The ... other options menu lets you export all forms (intakes), print the patient profile, merge duplicates, and archive, ban or delete the patient.

Using Questionnaires to Populate Client Profiles
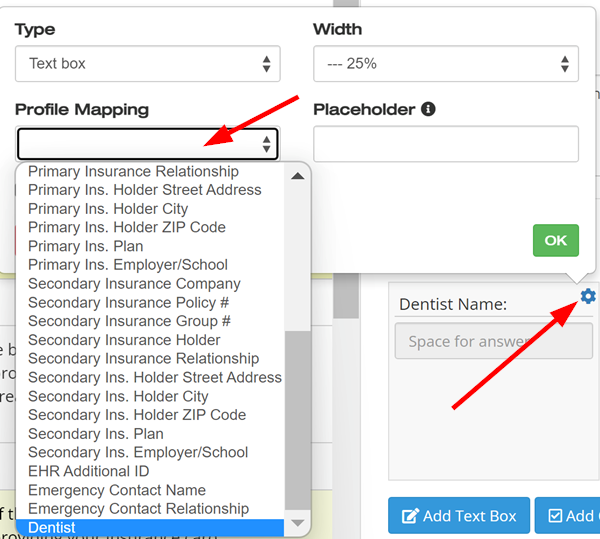
When setting up your patient questionnaires, you can map answers to fields to automatically populate the client profile. The Gaidge questionnaires have standard fields already mapped for you. To map a new field, click on the gear icon of any question in a questionnaire, then click on the profile mapping box and select the appropriate field.
Adding New Clients
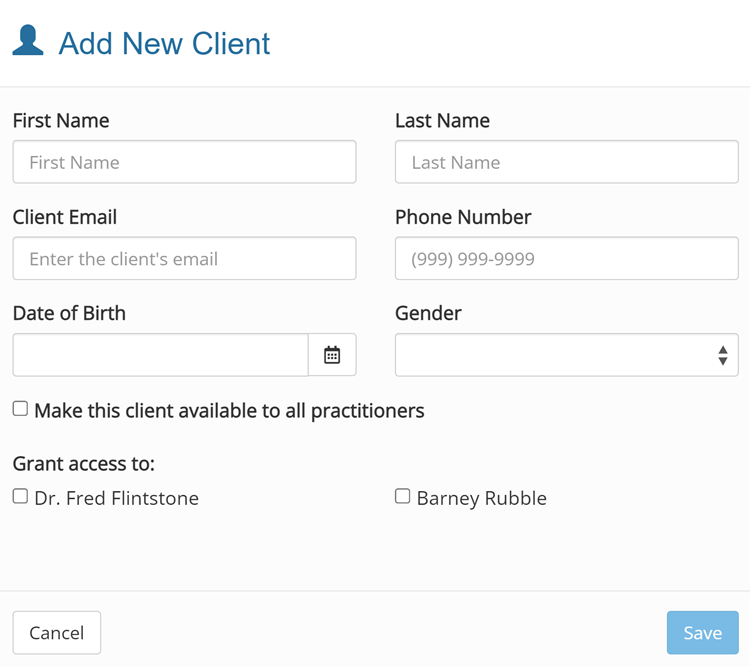
 The Add New Client window opens, fill in the patient's information and click Save